Start with click 'Send now' on the page or 'Overseas Transfer' on the tab.
1. Select sending information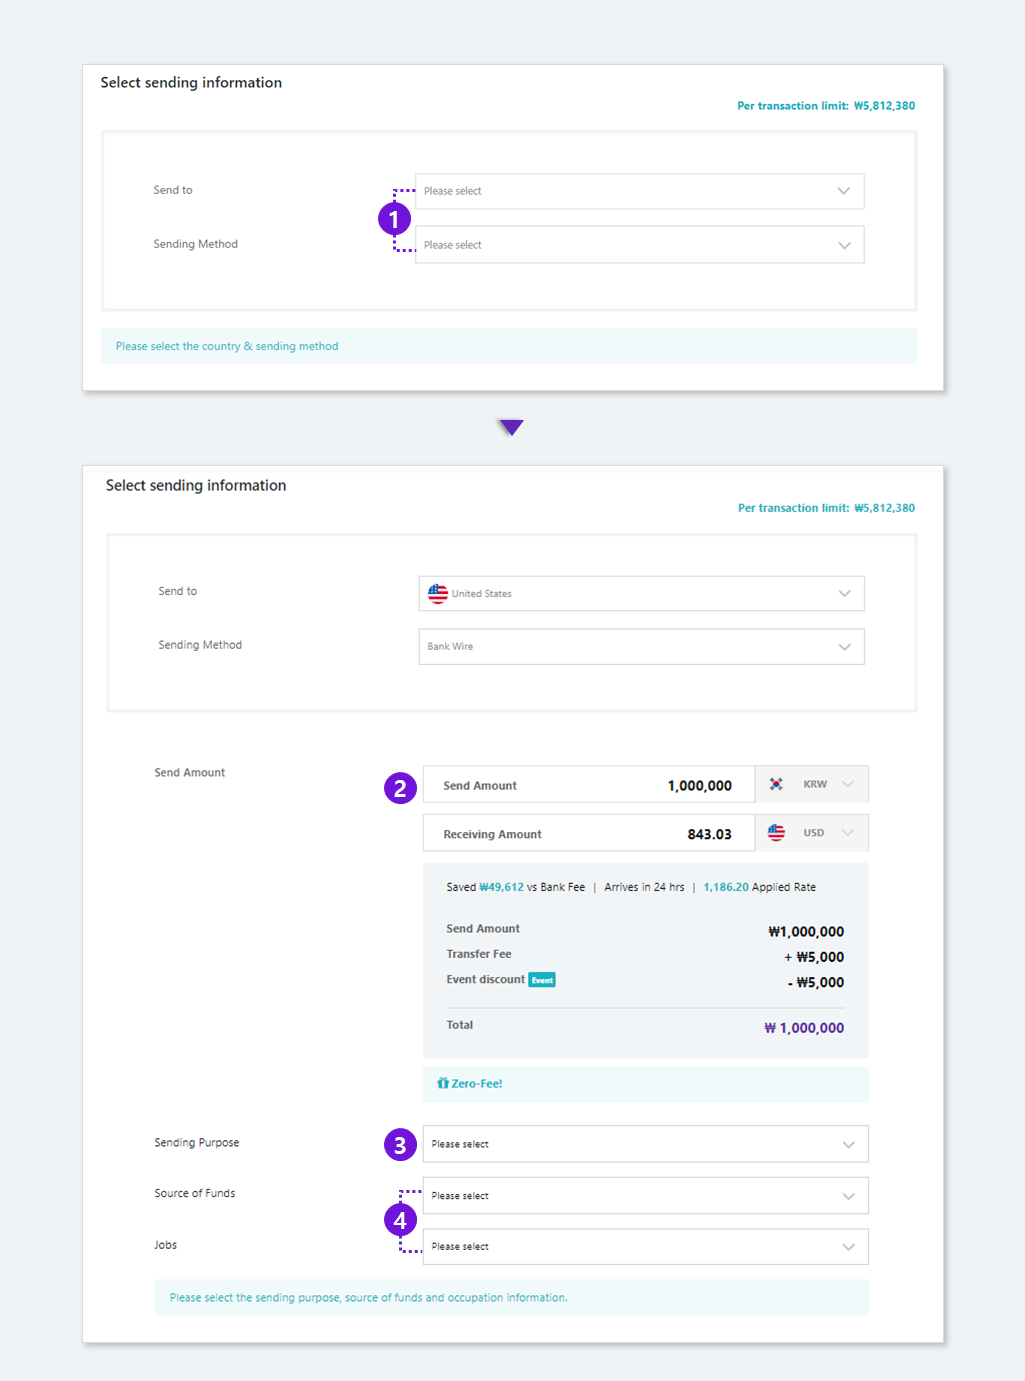
① Select the benenficiary country and sending method.
② Input the amount.
★ 'Send Amount' and 'Receiving Amount' are automatically calculated when you input the either one.
★ Daily and annual limits are unchangeable.
③ Select the closest sending purpose on the category.
★ If it's for tuition, select education.
④ Select the 'Source of Funds' and 'Jobs'
2. Input the recipient's bank information.
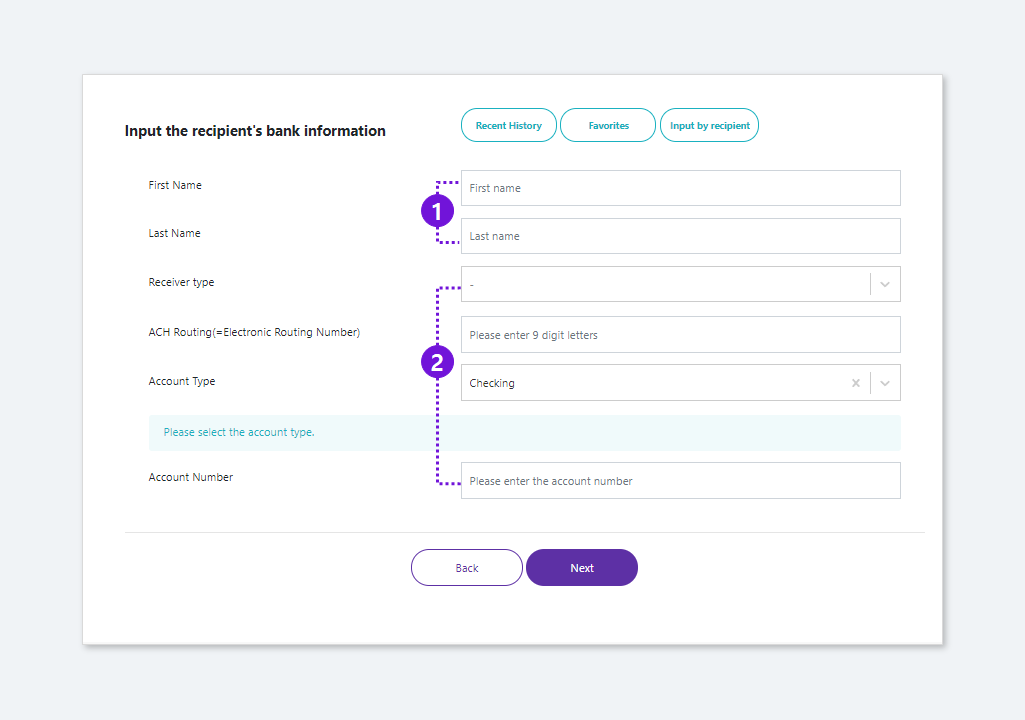
① Input the beneficiary's name.
★ If the benenficiary's name is not separated like a corporation, input the name separately on each placeholder (ex. firstname: U, lastname: transfer)
② Input the recipient's bnka information correctly.
★ The mandatory beneficiary's information is different depending on the receiving country, refer to the remittance guide.
★ If the recipient's information is different, the transaction would be declined and penalty fee would be deducted so that input the correct information.
★ In case of transferring to institution
- The sender's name could be displayed as our partner's name, not sender's name.
If the sender's name should be displayed, don't transfer to the institution directly.
- If you need the Remittance certificate, inquire to the support team.
③ (If you have the previous transaction history) You can register to 'Favorites' or call the previous recent transaction information from the 'Recent History'.
④ Transfer to the registered bank account on ③ or input the recipient's bank information manually. If the previous transaction has been successfully done, you can see the 'Verified' tag and if it's failed, 'Unverified' tag. For detail, go to the 'Additional function'.
⑤ You can also let the benenficiary input their bank information themselves through forwarding the link via email or text message. For detail, go to the 'Additional function'
3. Check the beneficiary bank information
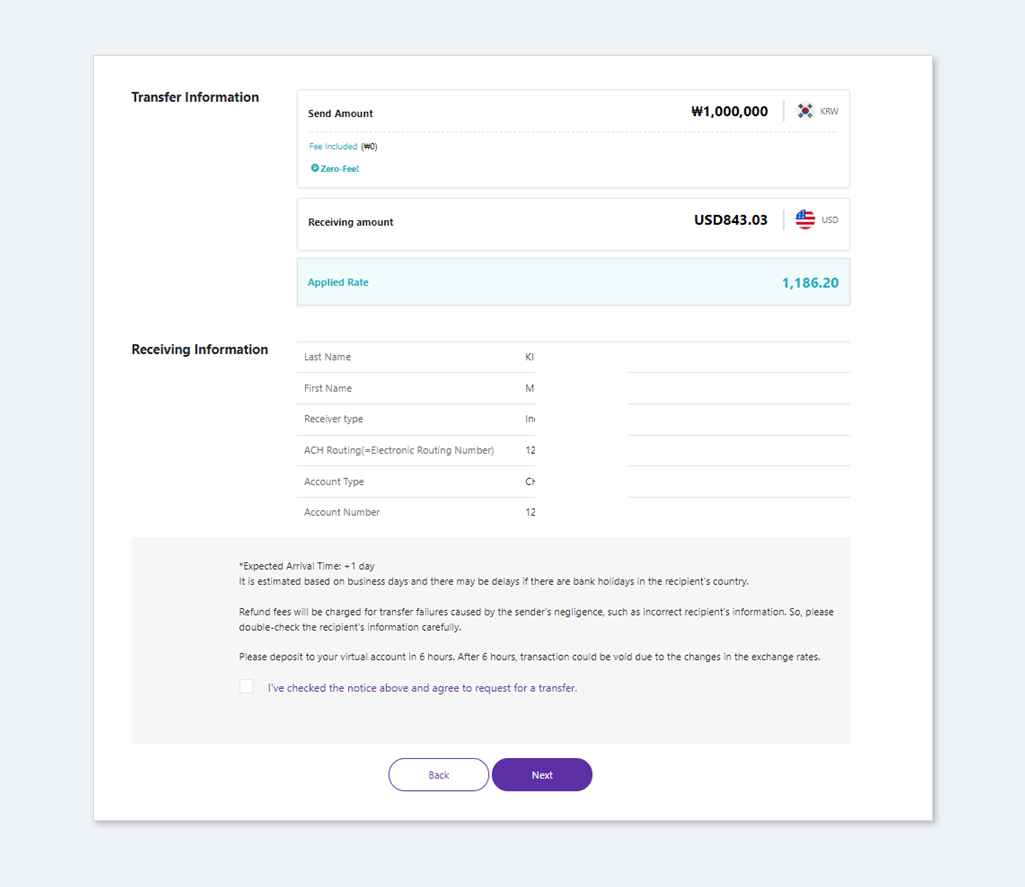
① Please check the sending / receiving amount.
② Once the transaction starts, it can't be canceled. Double check the benenficiary's bank information.
③ Please read the cautions and click 'Next' button.
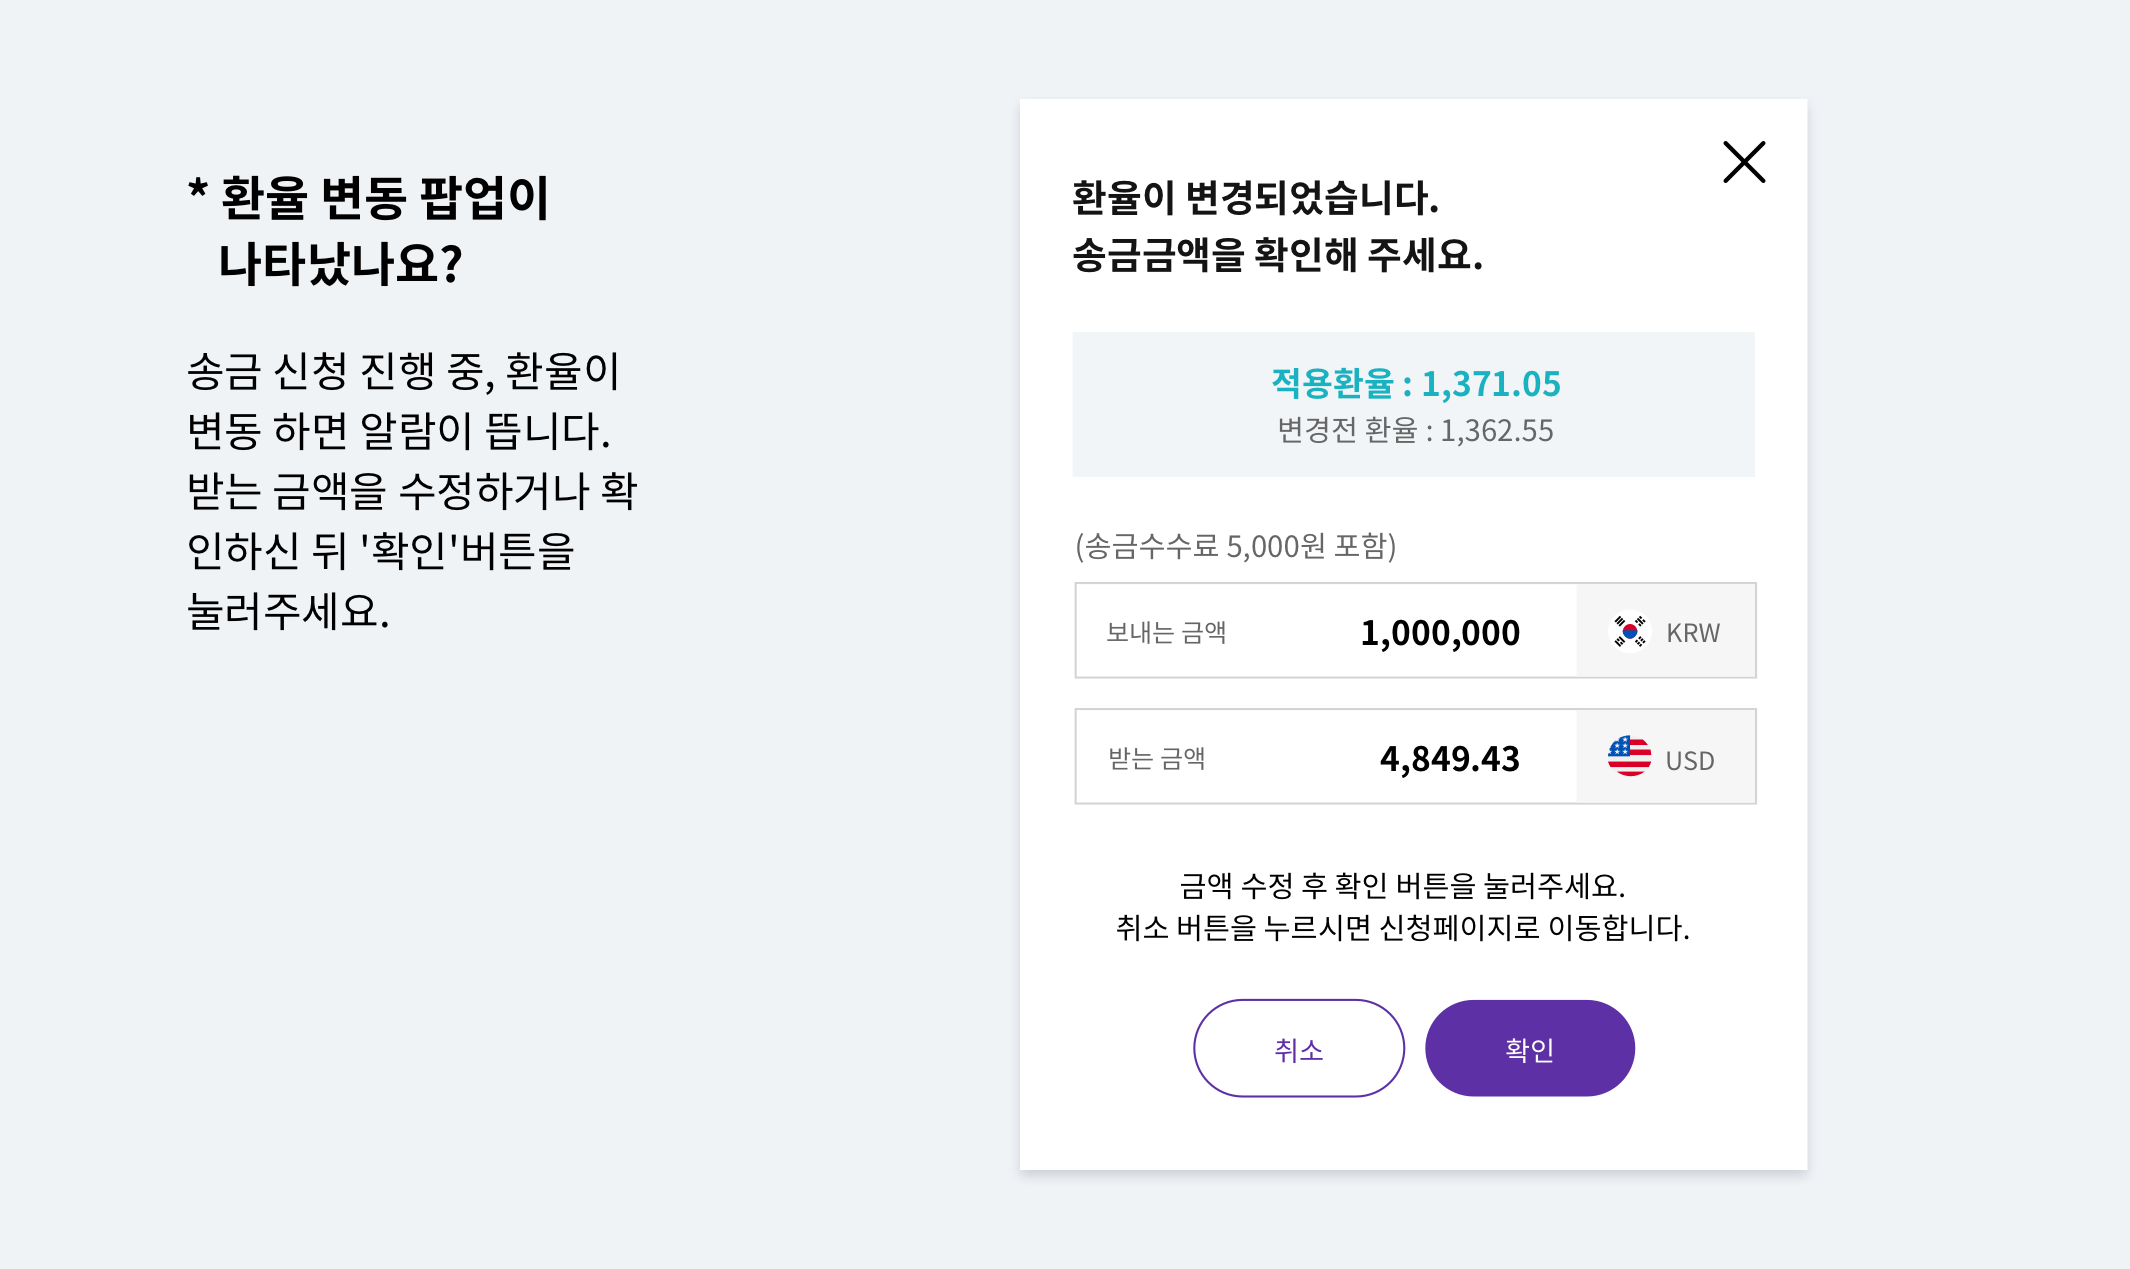
** Did you see the rate changed pop-up? the pop-up comes out if the rate is changed while the transaction is being created. Confirm or change the receiving amount and click 'Next'
4. Check the verified bank account.
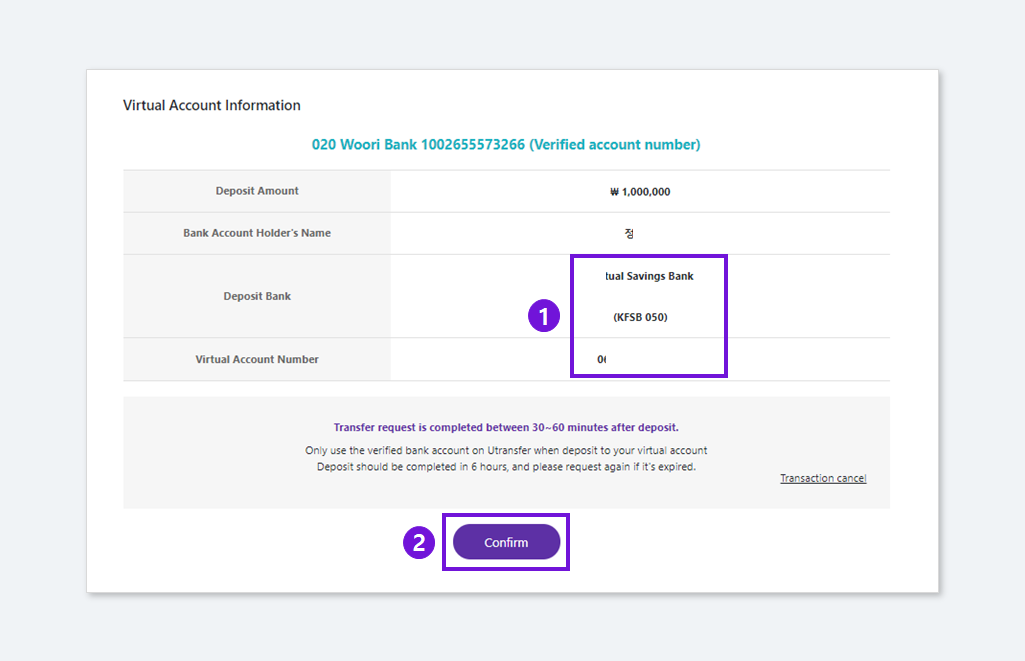
① Check the verified bank account.
② ① Transfer exactly same amount on 'Deposit Amount' to your virtual account number from your verified bank.
★ You can't transfer from other payment services such as TOSS / Kakaopay / Wibee or branch.
Please transfer the amounts from the verified bank.
★ You have to transfer the exact amount from your verified bank account at once.
★ If you keep experiencing fail on transaction, Try to change your verified bank or contact to support team.
★ As soon as you deposit to your virtual account, the transaction begins, please contact to support team if the transaction status is not changed even after you deposit.
③ (Only before Deposit) If you'd like to cancel the transaction before deposit, click the 'Cancel' button.
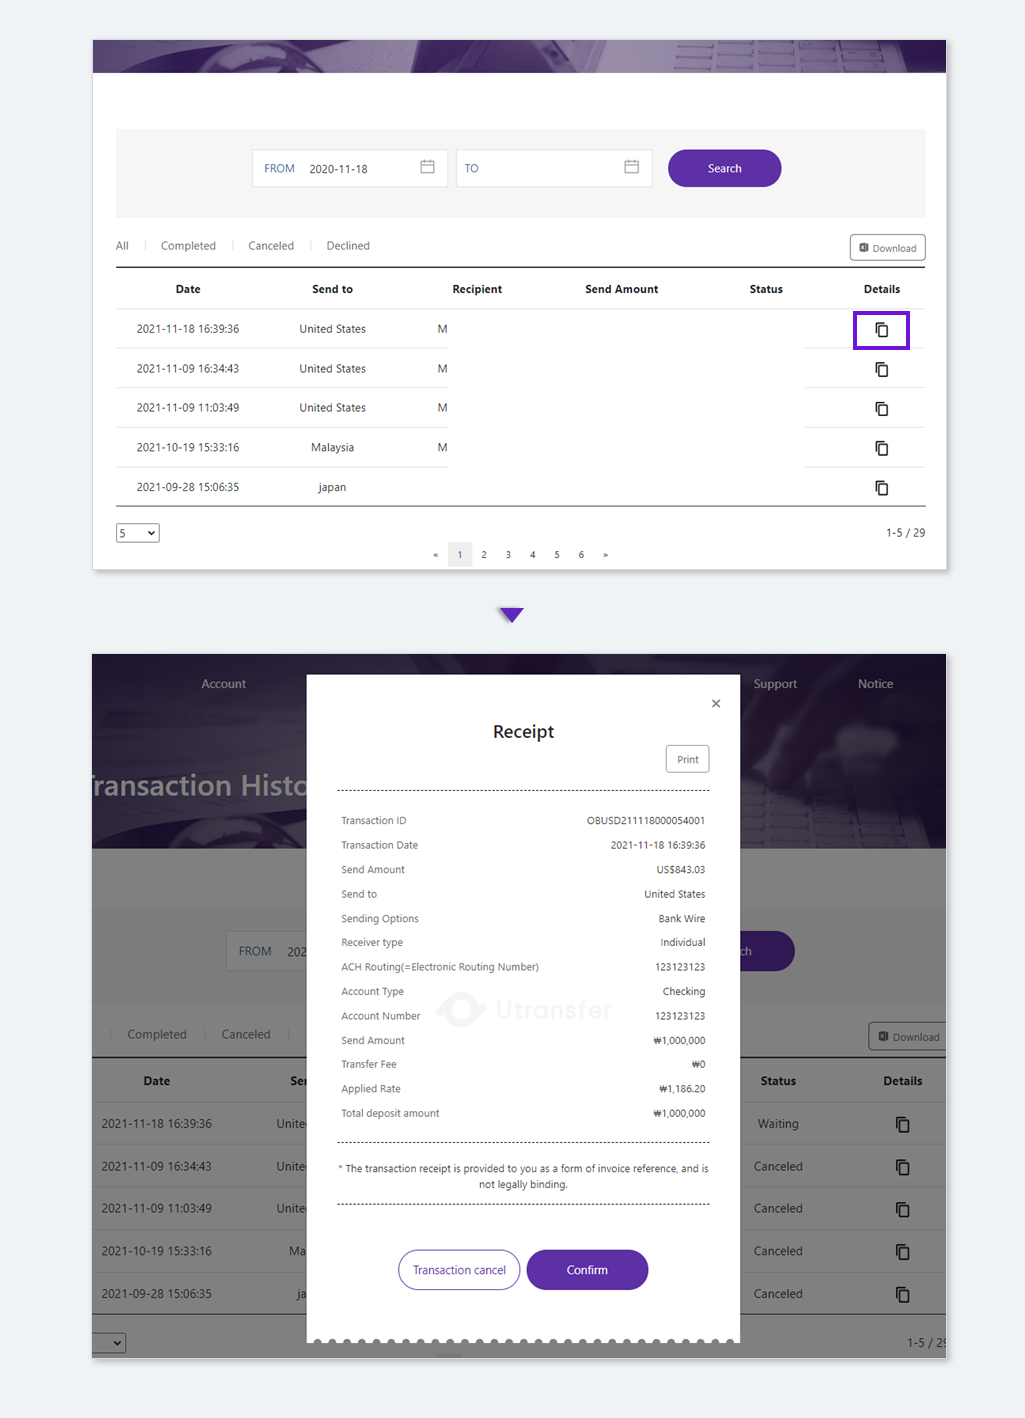
* Where can I find my transaction history?
You can check your transaction detail on [Log in > Transaction history > Details > Receipt]